A roof can have quality shingles, proper ventilation, and a solid-looking surface yet still leak at a chimney, skylight, or wall connection. Those are the places where water changes direction, collects, or is driven sideways by wind. What does roof flashing do? It protects these vulnerable transitions by directing water back onto the roof surface and safely toward the drainage path.
Flashing is not a cosmetic detail. It is one of the most important water-management components in a residential or commercial roofing system. When it is installed correctly, it works quietly for years. When it is missing, poorly integrated, or damaged, a small opening can lead to stained ceilings, wet insulation, wood rot, mold growth, and costly structural repairs.
What Does Roof Flashing Do at Critical Roof Joints?
Roof flashing is a thin, durable material installed where shingles or roofing membranes meet another surface. It is commonly made from aluminum, galvanized steel, copper, or specialty membrane materials, depending on the roof system and the detail being protected.
Its primary purpose is simple: it creates a controlled path for water. Rather than allowing rain or melting snow to work beneath roofing materials, flashing overlaps and redirects the water outward. A properly detailed flashing assembly uses gravity, laps, and drainage channels to move water away from seams.
This matters because shingles are designed to shed water on an open roof plane. They are not designed to seal every angle, penetration, or vertical transition. Around roof features, water can pool, run sideways, or be pushed upward by wind. Flashing provides the protection that shingles alone cannot.
In Toronto-area winters, this role becomes even more significant. Freeze-thaw cycles, snow buildup, ice dams, and wind-driven rain place extra pressure on roof edges and transitions. A flashing detail that is merely acceptable in mild weather may fail sooner when exposed to repeated temperature changes and moisture.
Where Roof Flashing Is Installed
Flashing appears in several locations, each with a different job. The workmanship at these areas often determines whether a roof remains watertight over its service life.
Chimneys
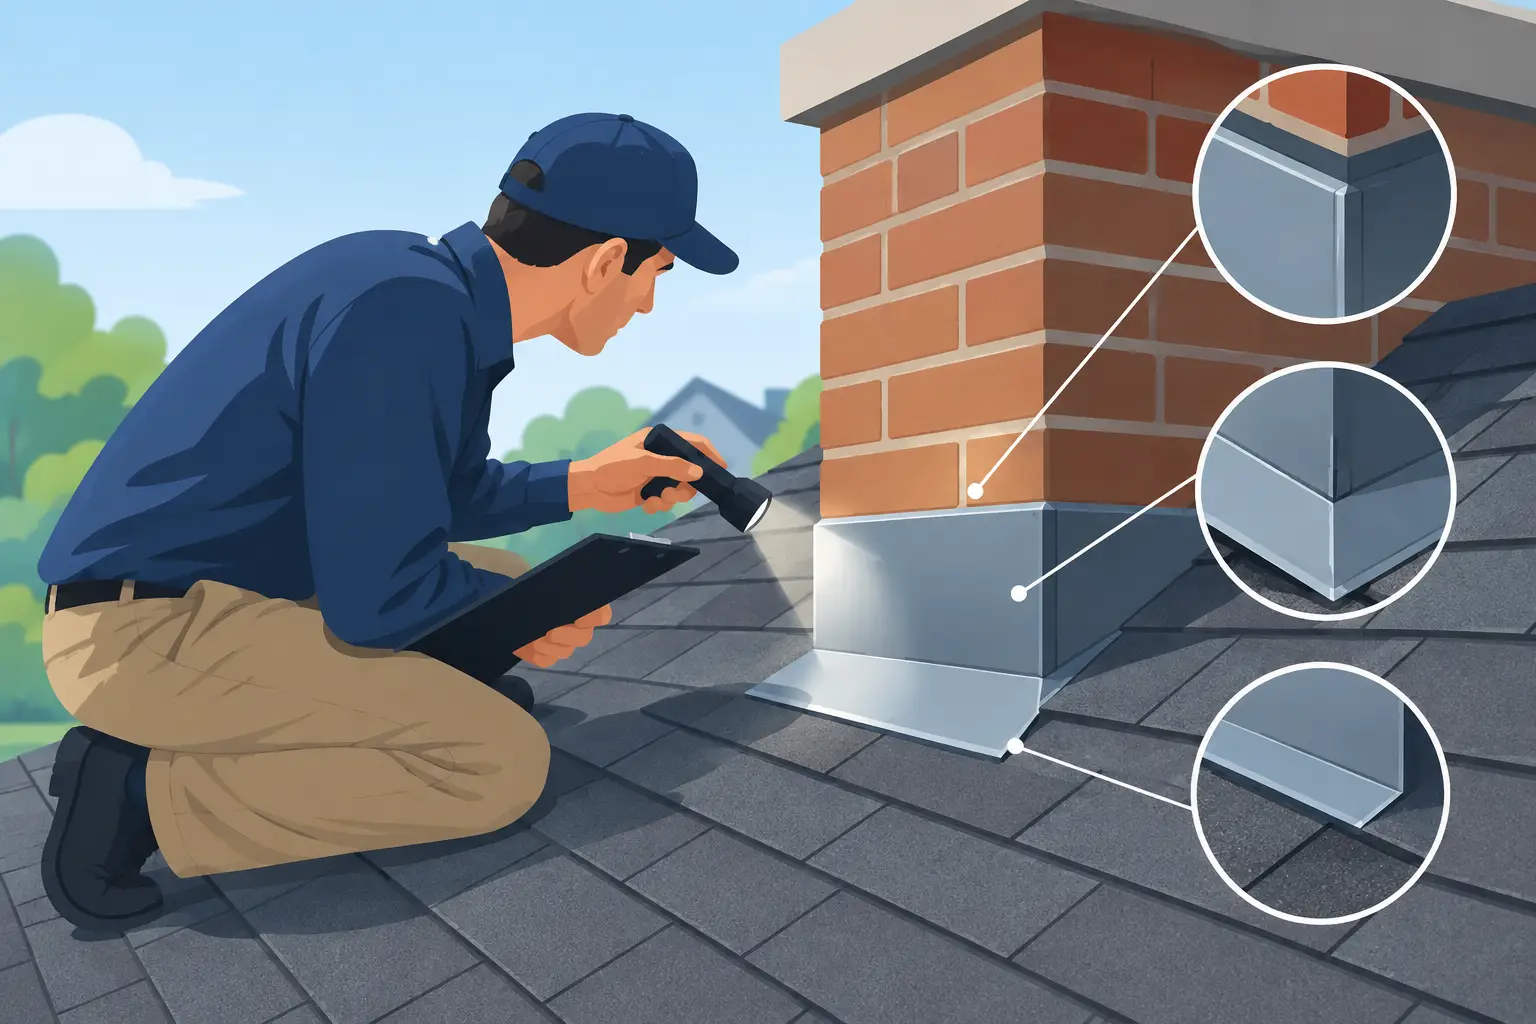
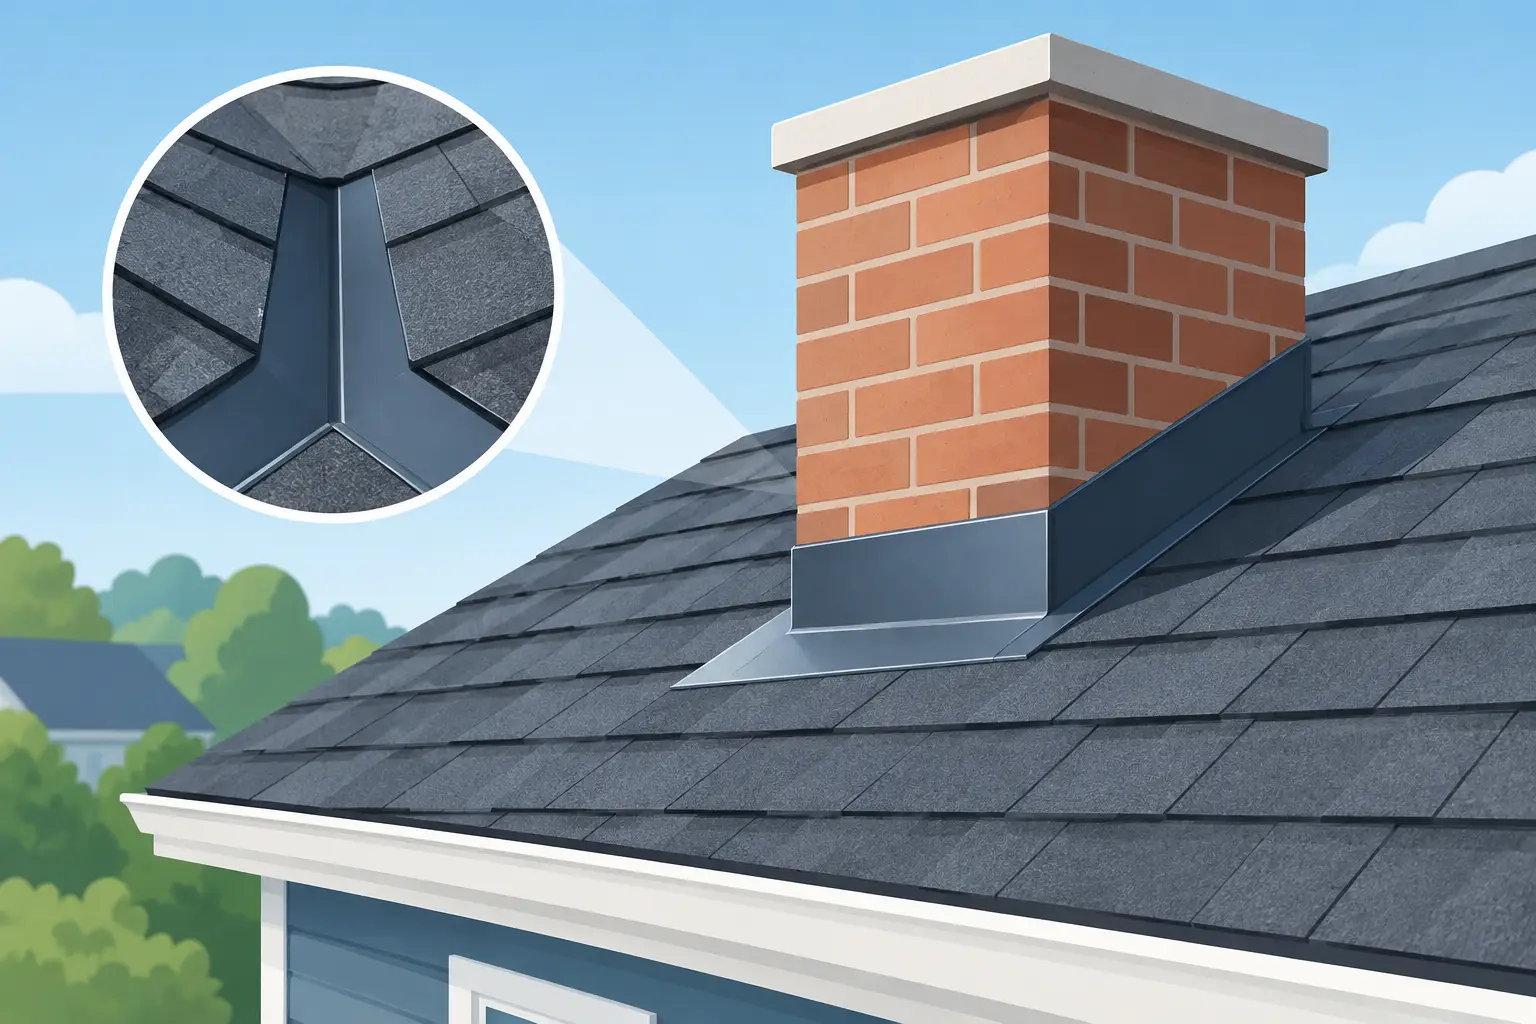
Chimneys create one of the most leak-prone areas on a roof because they interrupt the flow of water. Chimney flashing normally includes base flashing, step flashing along the sides, counterflashing attached to the masonry, and a cricket on the uphill side when the chimney is large enough to require one.
The cricket diverts water, snow, and debris around the chimney rather than allowing buildup behind it. Counterflashing is especially important because it protects the upper edge of the base flashing from water intrusion. Caulking alone is not a long-term substitute for properly integrated counterflashing.
Sidewalls and Dormers
Where a sloped roof meets a vertical wall, installers use step flashing. Individual flashing pieces are woven between shingle courses, with each piece directing water over the next lower piece. This overlapping method is designed to shed water even when rain is driven toward the wall.
The wall cladding and its weather barrier must also be correctly integrated above the flashing. If the sequencing is wrong, water may get behind the siding or veneer and reach the roof deck.
Valleys
A valley is where two roof slopes meet. It receives a high volume of runoff, so it needs careful detailing. Depending on the roofing system, valleys may use metal flashing or a membrane-based valley treatment beneath the shingles.
Valley problems can result from exposed fasteners, cracked sealant, poor shingle cuts, debris buildup, or roofing materials that were not installed in the correct order. Because water naturally concentrates in this area, even a small defect can become a noticeable leak.
Skylights, Vents, and Pipe Penetrations
Skylights need flashing kits that match the manufacturer’s requirements and the roof covering. A properly installed kit integrates with the shingles or roofing material instead of relying on surface sealant to hold back water.
Plumbing vents, exhaust vents, and other penetrations use boots, collars, or specialized flashing components. Rubber boots can dry out and crack with age, while metal components can corrode or loosen. These are common repair items during roof maintenance inspections.
Roof-to-Wall and Edge Details
Flashing may also be used at roof edges, low-slope transitions, parapet walls, and locations where different roofing materials meet. On commercial roofs, these details can include coping, termination bars, expansion joints, and membrane flashings. The exact method depends on the roof design, material, slope, drainage layout, and manufacturer specifications.
Flashing Is a System, Not Just a Strip of Metal
One of the most common misconceptions is that roof flashing is simply metal placed over a problem area. Effective flashing is part of a complete roofing assembly. It must work with the underlayment, ice and water protection, shingles or membrane, wall materials, and drainage system.
For example, applying roof cement over a leaking chimney flashing may slow a leak temporarily, but it does not correct failed laps, damaged masonry joints, or improperly installed counterflashing. Heavy sealant can also trap water, conceal corrosion, and make a future repair more difficult.
Professional roof repairs begin with identifying the true entry point. Water does not always appear inside the building directly below the roof defect. It can travel along framing, insulation, or a roof deck before becoming visible. An experienced roofer examines the flashing assembly, surrounding materials, attic conditions when accessible, and the direction water is likely to travel.
Signs Your Roof Flashing May Need Attention
A roof leak is the clearest warning sign, but it is not the only one. Homeowners and property managers should watch for rusted metal, lifted flashing edges, cracked sealant, missing fasteners, loose siding near roof intersections, or shingles that are separating around a chimney or skylight.
Inside the building, look for ceiling discoloration, peeling paint, damp insulation, musty odors, or staining near exterior walls. These signs do not automatically mean the flashing has failed, but they justify a professional inspection before moisture damage spreads.
After a major windstorm, heavy snowfall, or repeated freeze-thaw weather, it is wise to inspect the roof from the ground for visible damage. Do not climb onto the roof to check flashing yourself. Flashing areas are often steep, slippery, and easily damaged by foot traffic. A trained roofing team has the safety equipment and experience to inspect these areas without creating additional problems.
Repair or Replace: What Is the Right Approach?
The right solution depends on the condition of the flashing and the surrounding roof materials. If a small section has come loose while the shingles and underlayment remain in good condition, a targeted repair may be appropriate. This could involve resecuring or replacing a section of flashing, correcting a lap, or replacing a cracked vent boot.
If the roof is near the end of its service life, replacing isolated flashing may not provide lasting value. New flashing installed beside worn, brittle shingles can be difficult to integrate properly. In that situation, a roof replacement may be the more responsible investment because it allows the entire system to be rebuilt with compatible materials and correct drainage details.
Chimney work can also involve a separate trade. If the masonry is deteriorated or the chimney crown is cracked, roofing repairs alone may not solve the source of water intrusion. A detailed estimate should clearly explain what is included, what related work may be needed, and whether the repair will affect manufacturer warranty coverage.
Why Installation Quality Matters
Flashing failures are often installation failures rather than material failures. Incorrect overlap direction, exposed nails, insufficient membrane protection, poor integration with siding, and overreliance on caulking can all shorten the life of a roof detail.
Qualified installers follow the roofing manufacturer’s requirements, local building practices, and safe working procedures. They also understand that every roof has its own conditions. A low-slope roof, a complex shingle roof, a century home with masonry, and a commercial building with parapet walls cannot be treated with one generic flashing method.
At Toronto Roofers, roof inspections and repair recommendations are based on the actual condition of the roof system, not a one-size-fits-all fix. Trained, safety-compliant installers can identify whether the issue is isolated flashing damage, a broader roofing concern, or a building-envelope detail that requires coordinated work.
A dry roof depends on the details that are easy to overlook from the ground. If you have noticed staining, loose materials, or recurring leaks around a roof transition, arrange an on-site assessment before a minor flashing defect turns into damage beneath the roof surface.